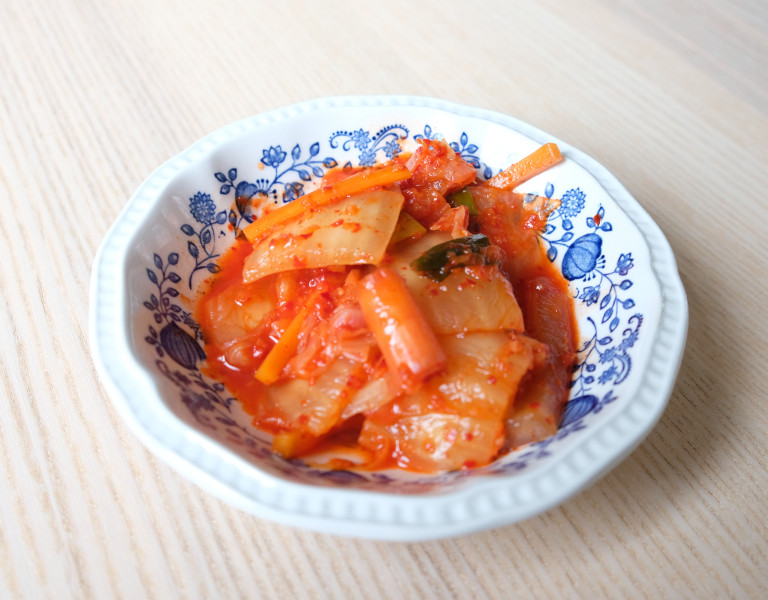
Kimchi
This is not a food blog, so you get the recipe at the top. No need to scroll down through childhood memories.
Recipe
Ingredients:
- 1 large Napa (Chinese) cabbage head (900g)
- salt
- 1 bunch green onion
- 3 medium sized carrots (222g)
- 1 small daikon radish (420g)
- 1 large asian pear (250g)
- 6 cloves (20g) garlic, peeled
- 5 cm (82g) piece ginger, peeled
- 60ml fish sauce
- 40g Korean red pepper flakes
- 2 L glass jar
Directions:
- Take your Napa cabbage and slice in half lengthwise. Cut each of those halves and cut in half again, making quarters. Cut each of those quarters into 2.54 cm wide strips.
- Take your cabbage and place into a large bowl, heavily seasoning it with kosher salt. Squeeze and toss your cabbage really hard, bruising it. Let it sit for at least 30 minutes.
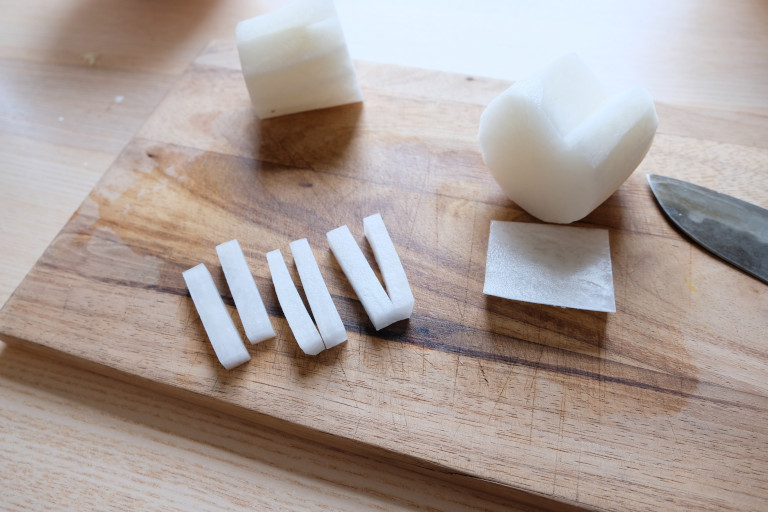
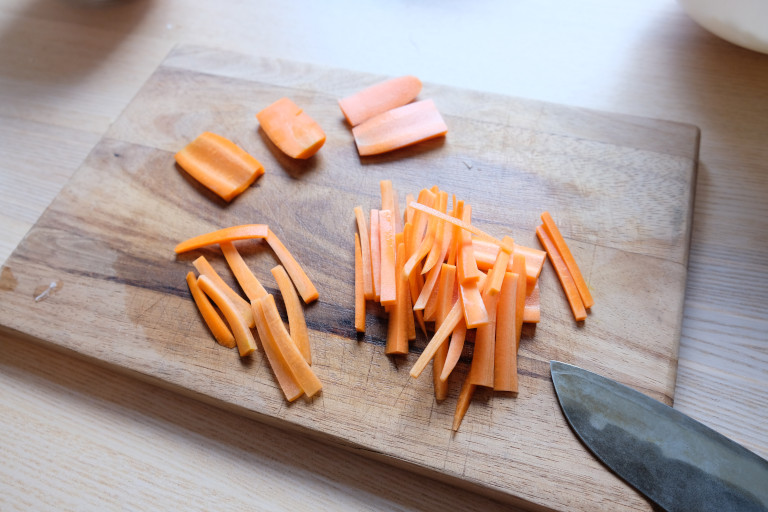
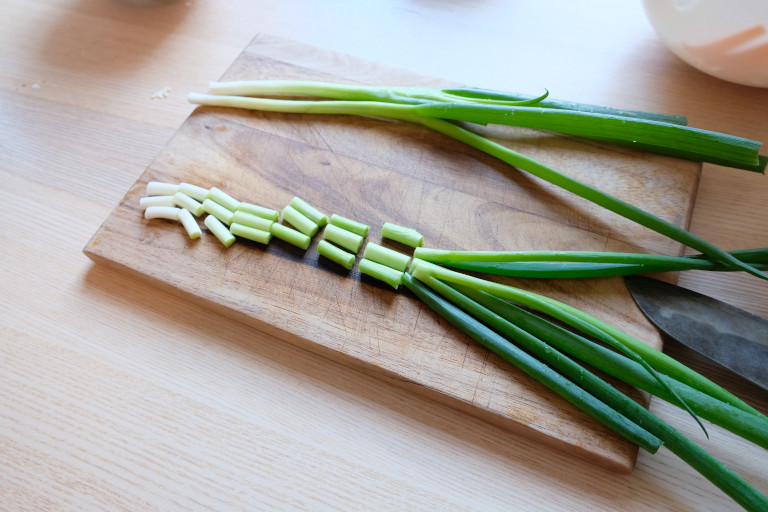
- While the cabbage is sitting, take your green onions and cut the root bottoms off. Cut the onion into 2.54 cm segments. Take your carrots and roughly chop them julienne style. Next, peel your medium-sized daikon and cut them like your carrots, but a thicker julienne chop.
- To make your paste, slice your 5 cm segment of peeled ginger and place into a food processor. Peel and chop an asian pear into cubes and add to the processor. Add in 6 cloves of peeled garlic, and 60 ml of fish sauce. Blend until smooth.
- Transfer paste to a medium-sized bowl and mix together with korean red pepper flakes.
- After your cabbage has been sitting, drain through a colander and rinse with water while squeezing at the same time. Toss and squeeze until you’ve washed off the majority of the salt.
- Add your cabbage and all of the vegetables you cut into a large bowl. From there, add in all of your paste and toss to thoroughly coat. Once evenly coated, pack contents into a 2 L glass jar that is large enough to fit the mixture. Using a spoon or muddler, press down all of the vegetables so it is packed together, removing any air bubbles in there.
- Loosely cap the jar off, making sure you don’t tighten it all the way down (for it to release gas) and let it sit for 4-7 days. Make sure to press it throughout this time to remove air bubbles that form.
- Once your Kimchi has reached the desired flavor point, tighten the cap all the way and store it in the refrigerator.
Et voilà!
But why?
Kimchi is a hot topic right now. I'm hoping to get a lot of visits off of this post.
No, but seriously. I have not found one person so far that tolerates spicy food and does not love Kimchi. It makes sense. It's really good and can be used in a ton of ways (like Kimchi fries or Kimchi Bloody Mary). It's also fermented, and I think we can all agree that things that are funky are way better than things that are not. Last but not least, there's some nice research on it.
But Cosmin, why not buy it when it's readily available basically "everywhere"? Well, as a wise man once said, "Everything tastes better when you make it from scratch" (Joshua Weissman). Actually, this recipe is ripped off from said Weissman, and adjusted here and there when it comes to quantities. Here's the recipe in video form, from his official channel if you need a visual aid.
The nice thing about making it yourself is that you understand the process and can then put your spin on it. Hate carrots? Swap them out for some parnsip. Don't like cabbage that much? Increase the amount of daikon radish. Maybe even add some bok choy in there. You do you.
BTW why do you hate carrots? Are you some kind of monster?
Let's Kim some chi!
First things first. Get everything ready.

You might notice that is no ordinary jar. You are right! Good eye.
It has a nifty way of not letting air in, but letting air out. I don't know what it's actually called, but my Brazilian friends told me it's a farting jar. I do not want to verify this by doing any research, as I think the name is very fitting. I just call it that now. You DO NOT need a farting jar to make Kimchi. Use a normal jar.
Let's get some prep in! Cabbage first.
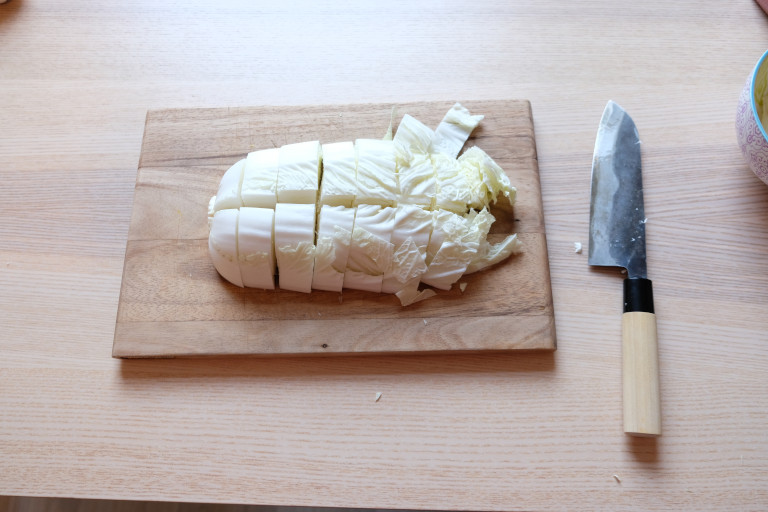
Cut, add salt, bruise, let it sit. Set aside.
Let's tackle the paste next!

I took some pictures of the chopped up ingredients for the paste, so you can see the sizes. This is really important because you then throw everything (+ fish sauce) in a food processor and blend the shit out of it. Pepper flakes should be folded in after blending.
On to the daikon radish! We want a french fry like cut, but shorter.
Carrots are next. Do your best to cut them in planks, and then cut slivers of that.
Let's do green onions. A cut of roughly 2.54 cm would do. Metric rules!
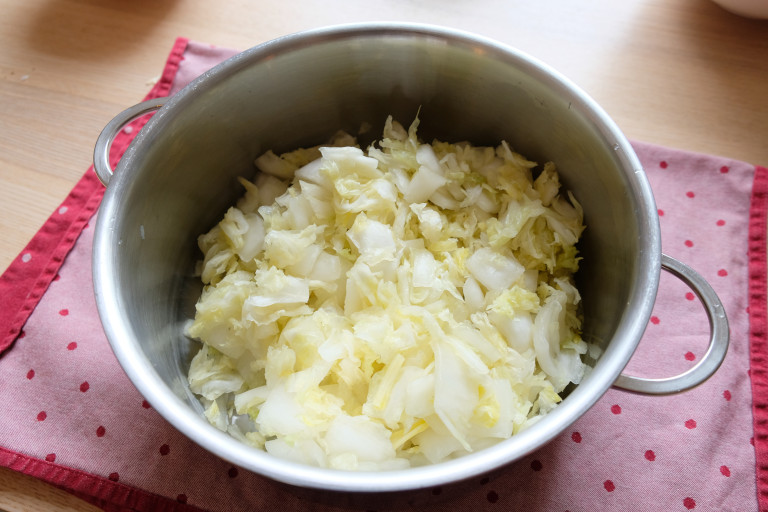
Time to rinse the cabbage thoroughly. That means a lot. Squeeze the water out of it as well. We don't want wattery kimchi. Dump it in a large pot. We need space to mix everything together.
Add all the veggies to the pot along with the paste. It's time for some magic!
Remember kids: It's always a good idea to wear gloves when any considerable amount of capsaicin is involved. Also, you probably don't want your hands to smell of fish sauce.

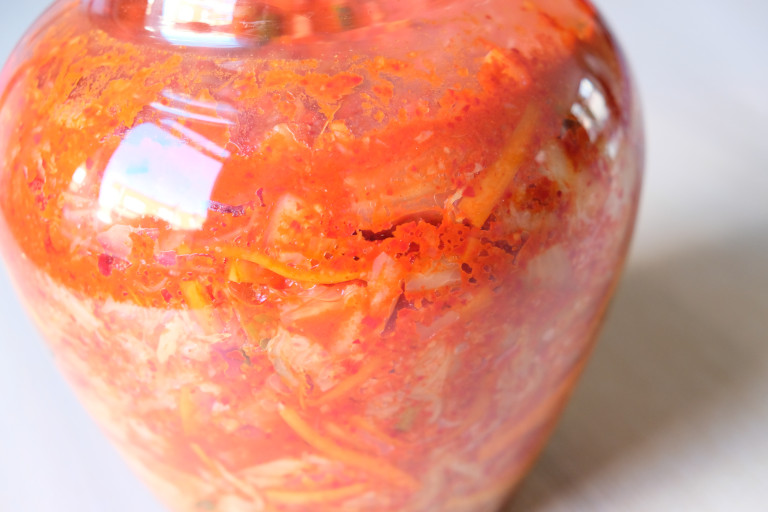
Let's bring out the farting jar. Dump mix in and pack everything as tight as you can. Ideally, solids should be under the liquid. This will be easier to accomplish as days go by.

Notice the jar is maybe 3 quarters full. This is important because during fermentation you will get an increase in volume as a result of all the wonderful mingling happening there. The extra space will come in handy.
Place in a dark warm spot. Ideally you want something above 18°C, but below 24°C. The hotter it will be, the quicker it will ferment. All in all it should take anywhere between 4 to 7 days, but you should check starting day 4.
As fermentation happens, air bubbles will form. Exterminate!
You need to smoosh everything once a day to get the air to the surface. Care for your kimchi, peeps!
Once it's reached your desired funkyness, transfer it to smaller jars and keep it in the fridge. It will continue to slowly ferment, but I will bet you it won't last long.
That's it! 🎉
If you do try this recipe out, please let me know in the comments.